
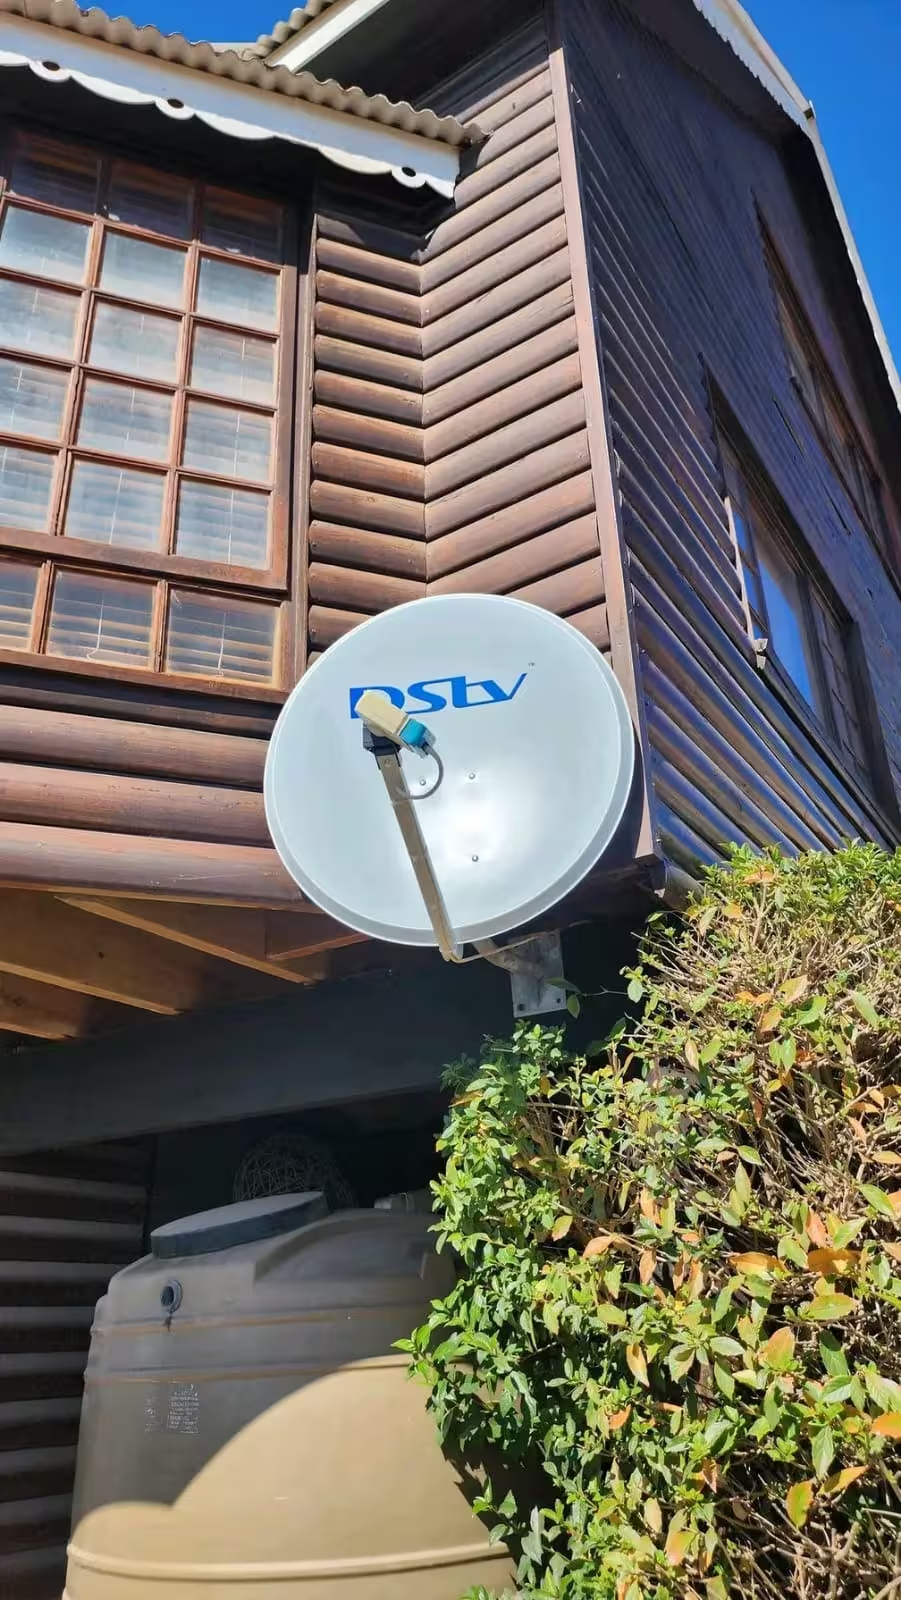
DStv self-installation in Cape Town is a genuinely viable option for the right setup — but the city’s south-easter winds, coastal salt air, and the satellite’s low elevation angle from the Cape create failure modes that catch most first-time DIY installers off guard.
Key Takeaways
- DStv self-installation in Cape Town works reliably for simple single-view setups in inland suburbs with an unobstructed southern sky exposure
- Total DIY hardware costs run R770–R1,440 — surprisingly close to a professional installation at R800–R1,400 all-in
- Cape Town’s south-easter regularly exceeds 60 km/h; a dish mounted with standard wall plugs instead of masonry anchors will shift alignment within the first strong wind event
- Properties within 3–5 km of the coast face accelerated LNB and connector corrosion that retail hardware packs are not designed to handle
- MultiChoice requires accredited installers for Explora decoder activation and for warranty coverage on decoders purchased within the past 12 months
- Adding a TV point to an existing working dish is the safest and most cost-effective DIY task — no re-alignment needed
DStv Self-Installation in Cape Town: What Equipment Do You Actually Need?
Before attempting DStv self-installation in Cape Town, confirming that you have the correct hardware prevents the most common DIY failure — attempting alignment with an incompatible LNB or using under-spec coaxial cable that degrades signal over a long run.
| Equipment Item | Approximate Cost (2026) | Where to Source |
|---|---|---|
| Standard 80 cm satellite dish | R350–R550 | Builders Warehouse, Makro, installer suppliers |
| Universal LNB (single or twin output) | R120–R280 | Electronics retailers or installer suppliers |
| RG6 coaxial cable (per metre) | R8–R15/m | Electrical wholesalers, Builders Warehouse |
| Wall or roof bracket kit | R80–R200 | Hardware stores, installer suppliers |
| F-connectors (pack of 10) | R30–R60 | Electrical suppliers, Takealot |
| Budget signal meter | R180–R350 | Takealot, electronics stores |
Total hardware cost for a basic single-view DIY installation in Cape Town runs approximately R770–R1,440. Compare that to a professional all-in installation of R800–R1,400 including labour. The financial saving is considerably narrower than most people expect — and all risk remains with you if something goes wrong during or after the installation.
What Cape Town’s Environment Does to a DIY Install
Before weighing the cost saving, it is worth understanding the five specific ways that Cape Town’s environment makes DStv self-installation in Cape Town more demanding than a similar job in Johannesburg or Pretoria.
- Wind-shifted dish alignment: Cape Town’s south-easter regularly exceeds 60 km/h. A dish mounted with standard plastic wall plugs into plaster — rather than expanding masonry anchors bolted into brick — will shift. Even a 2-degree movement in pointing angle drops signal from optimal to unusable, and the shift is rarely visible to the naked eye.
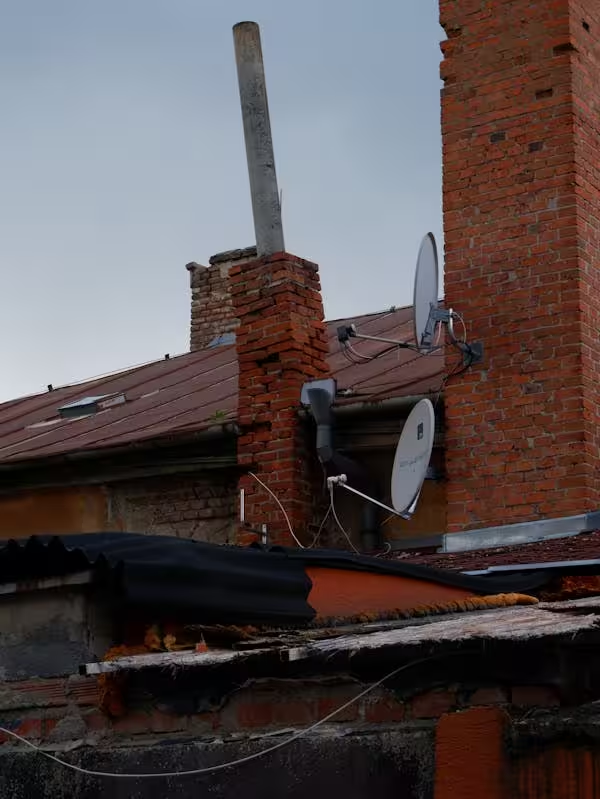
- Coastal salt corrosion: Properties within 3–5 km of the coast — from Bloubergstrand through to Somerset West and Strand — see accelerated corrosion on LNB connectors and coaxial cable terminations. Standard retail hardware is not rated for this environment. Professional installers working on the coast use stainless steel fixings and corrosion-resistant LNBs sourced from specialist suppliers.
- Low satellite elevation angle: From Cape Town, the Intelsat 20 satellite sits at roughly 47 degrees elevation — lower than from most of South Africa. This means the dish is pointing closer to the horizon, where tree canopies, neighbouring rooflines, and slope obstructions are more likely to block the signal path than they would further north.
- Load shedding timing: Completing a self-install requires power to run the decoder and confirm alignment. If your area goes into a load shedding slot mid-installation, you cannot verify pointing until power returns — potentially leaving the dish temporarily unsecured in wind while you wait for the grid to restore.
- Warranty risk: Any hardware fault on a decoder damaged during a DIY self-install may be attributed to the installation process and declined by MultiChoice’s warranty team, especially for decoders purchased within the past 12 months.
Is DStv Self-Installation in Cape Town Legally Permitted?
You are permitted to physically mount a dish and connect your decoder yourself. However, as stated on the official DStv installation page, MultiChoice requires accredited installers for Explora decoder activation, XtraView linking, and for maintaining warranty rights on recently purchased hardware. For new Explora Ultra or Explora 3 setups, attempting self-activation without an accredited installer risks the decoder locking out certain premium features permanently.
An accredited installer based in Kenilworth or Claremont will complete both the physical hardware setup and the MultiChoice decoder activation as a single visit, avoiding the risk of an out-of-warranty decoder that cannot be fully activated remotely.
When DIY Makes Sense — and When It Does Not
Not all self-installation scenarios carry the same risk. Here are the situations where doing it yourself is genuinely reasonable in Cape Town:
- Replacing an existing dish on the same bracket: Alignment is largely carried over from the original install. The job is mechanical — swap the dish, reattach the LNB and cable — with no re-pointing required if the bracket is undamaged.
- Adding a TV point to an existing working installation: Running extra cable from a working LNB through to a second room involves no alignment work at all. It is the lowest-risk DIY DStv task available.
- Inland properties with clear sky exposure: A property in Durbanville or Brackenfell with an unobstructed southern sky and brick walls for solid bracket fixing is a much more DIY-friendly environment than a coastal double-storey facing the south-easter.
The following scenarios make calling a professional the clearly better choice:
- A brand-new Explora or XtraView decoder that requires accredited activation
- Any coastal suburb within range of regular salt air spray
- A double-storey or roof-mounted installation requiring work above 3 metres
- A body corporate or sectional title complex with communal satellite rules
- Any property in Parklands or along the Atlantic Seaboard where wind and corrosion conditions are most severe
For any of the above, get a quote from our Cape Town team. We carry corrosion-rated coastal hardware, use masonry-anchor brackets suited to the south-easter, and handle decoder activation in the same visit.
The Real Numbers: DIY vs Professional Over the First Two Years
The sticker comparison between DIY hardware and a professional quote misses the longer arithmetic. What matters is the total spent over the first couple of years, once failed alignments, replacement parts, and rescue call-outs are counted.
What a Failed Self-Installation Actually Costs to Fix
The most common rescue scenario we see: a DIY dish that worked for weeks, then lost signal after the first big south-easter. By the time a professional arrives, the job involves re-anchoring the bracket, re-terminating corroded connectors, and a full re-alignment.
- Call-out and diagnosis — around R350–R650 (see the full DStv call-out fee guide)
- Re-alignment and bracket re-anchoring — around R350–R700
- Replacement LNB or connectors if water has entered — R200–R900
A rescued self-installation routinely ends up costing R900–R2,000 on top of the original hardware spend — more than a professional job from day one. Our signal repair cost guide breaks these figures down line by line.
Tools the Retail Hardware Pack Does Not Mention
Beyond the dish kit, a proper self-installation needs tools many households do not own. Budget for these before deciding the DIY route is cheaper:
- SDS or hammer drill with masonry bits — R600–R1,500 to buy, around R150–R250 per day to rent
- Compression tool for F-connectors — R150–R400; twist-on connectors fail early in coastal air
- Sturdy ladder rated for wall work — R900+ if you do not own one
- Spirit level, spanners, and UV-rated cable clips — R150–R300 combined
A professional’s price includes all of this plus calibrated meters. For what that quote covers item by item, see our complete DStv installation cost guide for Cape Town and check whether the installation price includes a decoder before comparing.

Insurance: The Hidden Cost of Skipping the Accredited Installer
Household insurance is the angle almost no DIY guide mentions. If wind or lightning later damages your dish, decoder, or roof, insurers commonly ask who performed the installation. Without an accredited installer’s job card, satellite-equipment claims — and even related roof-leak claims where the DIY bracket penetration failed — are frequently rejected.
An accredited installer leaves a signed job card with an accreditation number that doubles as your proof for both MultiChoice warranty and insurance purposes. Learn how to verify a DStv installer’s accreditation before booking anyone.
Picking the Right Mounting Spot If You Do Go DIY
Placement decides most of the outcome. A south-easter-sheltered wall below the roofline, solid brick fixing, and a clear line of sight at roughly 47 degrees elevation give a DIY job its best chance. Our guide on where to mount a DStv dish in Cape Town walks through the decision, and the DStv dish size guide explains why an under-sized dish struggles in winter rain fade.
Once the dish is up, run the decoder’s setup routine using our DStv installation wizard walkthrough to confirm signal strength and quality before you pack the ladder away. And if the quote still tempts you to haggle instead, here is how to negotiate with a DStv installer the right way.
Frequently Asked Questions About DStv Self-Installation in Cape Town
Can I legally install a DStv dish myself in Cape Town?
Yes, for a basic physical installation. You can mount the dish, run cable, and connect your decoder without breaking any rules. However, MultiChoice requires accredited installers for Explora decoder activations, XtraView linked setups, and for warranty-valid installations on decoders purchased within the past 12 months. If your decoder is new and under warranty, a self-install that results in hardware damage may not be covered by MultiChoice’s warranty programme.
What direction must a DStv dish face from Cape Town?
The dish must point toward the Intelsat 20 satellite at 68.5 degrees East. From Cape Town, this means a roughly northeast-facing dish at an elevation angle of approximately 47 degrees. The precise azimuth varies slightly with your exact GPS coordinates. Use the free DStv Signal Finder app on a smartphone for real-time signal feedback as you adjust the pointing, or invest in a budget signal meter for more accurate fine-tuning, which is particularly useful at Cape Town’s lower elevation angle.
How long does a DStv self-installation in Cape Town take?
For a competent DIYer on a straightforward single-view setup, allow two to three hours. This covers mounting the bracket, attaching the dish, running cable, terminating F-connectors, and aligning the dish with a signal meter. First-time installers should budget four to five hours and expect multiple passes on the alignment step before achieving a stable signal above 70 percent quality. More complex setups involving long cable runs through walls or ceiling cavities will add additional time.
Will a DStv self-installation void my decoder warranty?
It depends on how recently the decoder was purchased. MultiChoice’s warranty terms specify that installations must be completed by an accredited installer to maintain full coverage within the warranty period. If your decoder is within 12 months of purchase and a fault is traced back to improper connection during DIY setup — for example, a short circuit at the LNB input — that fault may be declined by the warranty team. Once a decoder is out of warranty, this risk does not apply and self-installation is simply a question of technical capability.
Is a signal meter necessary for self-installation in Cape Town?
Not strictly required, but strongly recommended for Cape Town specifically. The DStv Signal Finder app on a smartphone works for an initial rough pointing, but Cape Town’s lower satellite elevation angle (around 47 degrees) makes alignment more sensitive to small errors than the same job would be in Johannesburg. A budget signal meter costing R180–R350 provides real-time quality and strength readings that make it significantly easier to land on an optimal pointing angle. For a coastal or hillside property, a signal meter is worth the cost.
What is the most common mistake in a Cape Town DStv self-installation?
Under-fastening the dish bracket. Most DIY installers use standard plastic wall plugs and short screws rather than expanding bolt anchors into solid brick. Cape Town’s south-easter exerts far more force on a dish than most people estimate — a 90 cm dish in a 60 km/h wind is experiencing considerable load. A dish that feels firm by hand can shift by 2 degrees after the first serious wind event, dropping signal completely. Use 10 mm expanding bolt anchors rated for masonry, not plastic plugs, particularly for any mount above two metres from ground level.
Related DStv Guides
- How Much Does DStv Installation Cost in Cape Town?
- What Is the DStv Call-Out Fee in Cape Town?
- 7 Hidden DStv Installation Costs Homeowners Always Miss
- DStv Extra Cable Cost Per Metre in Cape Town
- Does the DStv Installation Price Include a Decoder?
- DStv Signal Repair Costs in Cape Town
Related DStv Guides
- DStv cables and connectors guide
- DStv dish brackets and mounting options
- permission to install a DStv dish
Need a DStv pro in Cape Town?
- DStv installers near me — certified local technicians across Cape Town
- DStv technician near me — book a skilled tech today
- DStv repairs near me — fast signal and decoder fixes
- DStv dish installation prices — 2026 Cape Town price guide
- DStv contact number Cape Town — local installer and repair line
More Cape Town DStv guides
Use these related cost and pricing guides if you are comparing options, diagnosing a fault, or planning a booking.
- How Much Does a Communal DStv Installation Cost?
- Can You Really Negotiate with Your DStv Installer in Cape Town?
- What Does DStv Extra Cable Actually Cost Per Metre in Cape Town?
- How Much Does It Cost to Relocate Your DStv Dish to a New House?
- 7 Hidden DStv Installation Costs Cape Town Homeowners Always Miss
- DStv installation cost in Cape Town
- DStv E48-32 signal error fixes
- where to mount a DStv dish
- DStv Explora vs HD decoder
- questions to ask a DStv installer
- DStv dish realignment and servicing